Over the past few years, I’ve been involved with a great non-profit here in Portland – Community Warehouse. They have an incredibly simple model – you give them your extra housewares and they give them to people who need them. Really, it’s that easy. Their clients are referred by social services agencies, so they don’t have to screen people and they have no waiting list. People who are transitioning from homelessness, shelters, hospitals, etc. can get the things they need to furnish their new homes. Often this means giving children beds to sleep in and bowls to eat from. I’ve seen it in action – people bring stuff to the warehouse and folks in need take it home.
Community Warehouse has a big fundraising event each spring called the Chair Affair. I had the opportunity to go to the Chair Affair for the first time last year and had a fantastic time! A wide variety of local artists use chairs, tables and other items donated to the warehouse to create functional artwork and tablescapes which are auctioned off at the event.
That brings us to the purpose of this post – I’m doing a chair for this year’s auction!
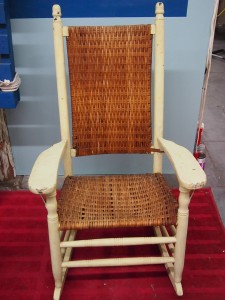
I started with a well-loved wooden rocking chair with a cane seat and back and nice broad arms. Here’s a before photo. The paint (all three layers) was chipping and drippy. The caning was dirty and broken at the edges.
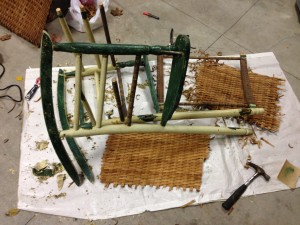
Here is a photo of the stripping and dismantling process. The top two layers of paint peeled right off with a heat-gun, but the bottom layer of dark green paint wasn’t going anywhere.
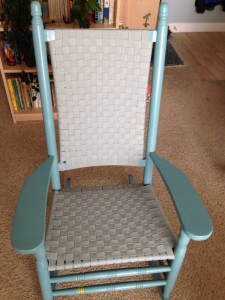
Once the stripping and sanding were done, I reassembled the chair, gave it a coat of strong primer, and painted it a fun new color!
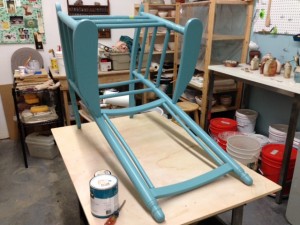
The next step was replacing the cane seat and back. After exploring lots of options, I settled on Shaker tape. It appeared to be fairly easy to work with, comes in lots of colors, and gave me the look I was after (understated, traditional but not old-fashioned). Of course it was more complicated than it should have been. Shaker tape is hard to find and surprisingly expensive (it wouldn’t have been so bad for the seat of a small chair, but this one has a large seat and large back). The weaving process is basically pretty simple – you just go around and around front-to-back, turn the corner and weave through the first set of strips going side-to-side (weaving both the top and under-side of the seat). Here are the directions I followed. My wonderful mom helped, and we only made a couple false-starts before we had it figured out. Turning the corner ended up being the most difficult part, followed closely by getting the spacing right and weaving the final strips (where it’s tight against the wood of the chair). Keeping 75 yards of tape from getting twisted and tangled wasn’t terribly easy either. We did a pretty fine job!
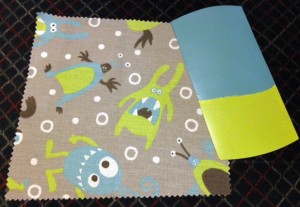
That bit of green paint you see at the bottom is an experiment – I considered highlighting the knobs and spindle areas with green to pick up the green in the fabric, but once they were all painted I wasn’t crazy about the look. Green in the fabric? Yep, the chair isn’t done yet! Still to come: alien cushions! Plus I still have that green paint… not sure if that will end up on the chair or some other craft project.
If you’d like to see the finished project (and bid on it!), come to the Chair Affair on April 18th!

